Connect to SingleStore Helios using AWS PrivateLink
On this page
Note
This is a Preview feature.
SingleStore does not recommend using this feature in a production environment.
Configure both the outbound and inbound connections to connect your workspace to AWS PrivateLink.
Configure Inbound Connections
To successfully set up an inbound connection to SingleStore Helios using AWS PrivateLink, you need to perform the following tasks:
Create an Inbound Connection on the Cloud Portal
On the Cloud Portal,
-
Select your_
Workspace_ Group > Firewall. -
Under PRIVATE LINKS, select Create Connection.
-
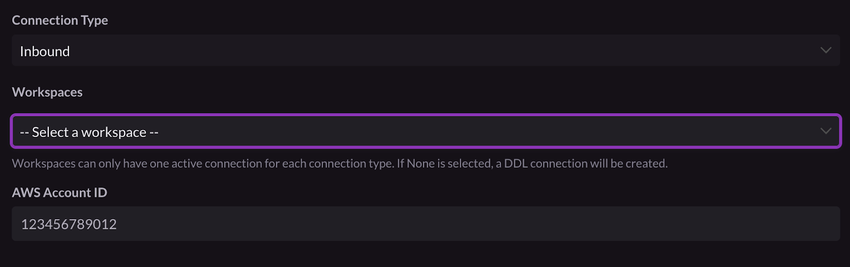
On the Create Connection dialog, enter or select the following information:
-
Connection Type: Select the Inbound connection type from the list.
-
Workspaces: Select your workspace you want to connect with from the list.
Select None to create a DDL connection. -
AWS Account ID (Inbound connections only): Enter the AWS Account ID associated with your VPC/private endpoint.
-
-
Select Create Connection.
Once the connection is ready to use, which may take a few minutes, its status changes to ACTIVE.DELETED status indicator to view the error message.
Copy the VPC Endpoint Service Name of your connection, and enter it in the Service name box while creating a private endpoint on the Amazon VPC Console.
Create a Private Endpoint on the Amazon VPC Console
Create a private endpoint using the Service name copied earlier:
-
On the Amazon VPC console, select Endpoints > Create endpoint.
-
Under Service Category, select Other endpoint services.
-
Enter the Service name copied from the Cloud Portal in the Service name box.
-
Select Verify service to verify the Service name.
-
Under VPC, select the VPC from which you'll connect with the AWS service.
-
Under Subnets, select one subnet per Availability Zone from which you'll connect to the AWS service.
-
Select Create endpoint.
You can use the endpoint after it enters the Available state.
Note
SingleStore Helios does not support Certificate Authority (CA) verification for inbound connections.
Configure Outbound Connections
To successfully set up an outbound connection to SingleStore Helios using AWS PrivateLink, you need to perform the following tasks:
Copy the AWS Account ID from the Cloud Portal
On the Cloud Portal,
-
Select your_
Workspace_ Group > Firewall > PRIVATE LINKS > Create Connection. -
On the Create Connection dialog, from the Connection Type list, select Outbound.
Copy the AWS account ID displayed below.
You'll need to whitelist this ID while creating your endpoint service (as explained below).
Create an Endpoint Service on the AWS Console
On the AWS Console,
-
Create a target group for each of the AWS services that you want to access using AWS PrivateLink, select EC2 > Target groups > Create Target group.
Refer to Target Groups for more information. -
Create a network load balancer, select EC2 > Load Balancers > Create Load Balancer.
-
Under Network Load Balancer, select Create.
Your workspace and the load balancer must be in the same region. Ensure that Cross-zone load balancing is enabled. -
In the AWS Console, select VPC > Endpoint Services > Create Endpoint Service, and associate it with the Network Load Balancer created in the previous step.
Your workspace and endpoint service must be in the same region. -
For this service, under Whitelisted principals, add the AWS account ID copied from the Cloud Portal in the
"arn:aws:iam::<account id>:root"format.This enables SingleStore to find and access the private endpoint service. -
Verify that the security group rules in your VPC allow inbound traffic from the endpoint service.
Refer to Control traffic to resources using security groups for more information. -
Copy the Service Name of this AWS endpoint service,
Create an Outbound Connection On the Cloud Portal
On the Cloud Portal,
-
Select your_
Workspace_ Group > Firewall. -
Under PRIVATE LINKS, select Create Connection.
-
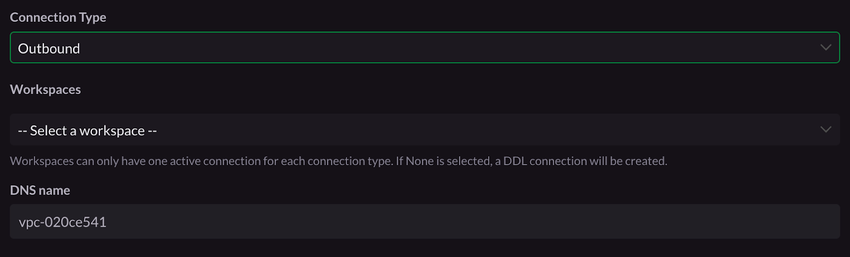
On the Create Connection dialog, enter or select the following information:
-
Connection Type: Select the Outbound connection type from the list.
-
Workspaces: Select your workspace you want to connect with from the list.
Select None to create a DDL connection. -
DNS name (Outbound connections only): Enter the Service Name associated with your AWS endpoint service.
-
-
Select Create Connection.
The connection is ready to use, once the endpoint status changes to Available.DELETED status indicator to view the error message.

Last modified: April 2, 2024